

Floppy Emu, Large and In Charge
After months of procrastination, I finally assembled the Floppy Emu board and began work on the firmware modifications this week. So far, so good! Despite being out of practice with soldering, the assembly went smoothly, and the board checked out fine electrically. The firmware has now been partially converted to the new microcontroller and pin arrangement, and I’m able to read the SD card and write to the LCD screen without problems.
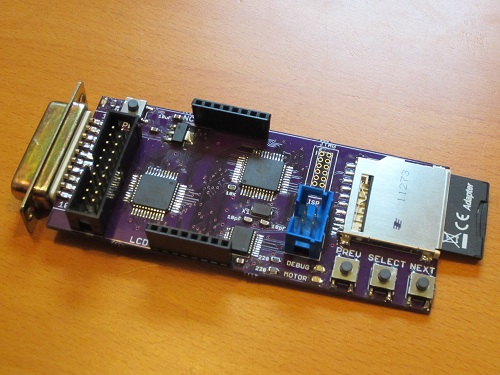
For those who may have missed the earlier progress updates, Floppy Emu is a floppy disk drive emulator for classic Macintosh computers like the Mac Plus. It plugs into the Mac’s DB-19 port, and behaves exactly like an external Sony 3.5″ disk drive would, so no special system software or other modifications are required. Floppy disk images are stored on a standard SD memory card, and a microcontroller (Atmel ATEMGA1284P) and CPLD (Xilinx XC9572XL) are used to read/write the floppy data. The data is converted into the GCR-encoded serial pulse stream that the Mac expects, exactly like the signal from a magnetic read head flying across a track on a real floppy disk.
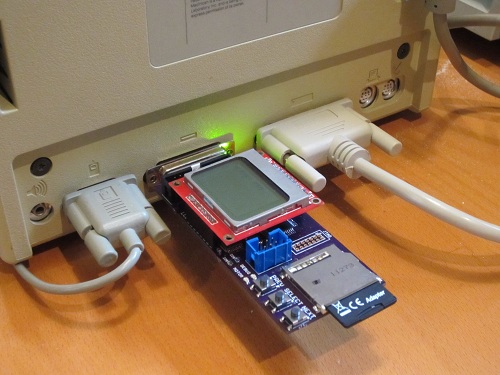
The Floppy Emu prototype was constructed on a breadboard, using whatever parts were on hand. The prototype demonstrated 100% successful read emulation of an 800K floppy disk, and partially successful write emulation, depending on the type of write operation and the specific SD memory card used. The new Floppy Emu board shown here uses a more powerful microcontroller and different type of CPLD, and combines everything onto a single custom-made circuit board that fits right into the back of the Mac at the external floppy port. Power is provided by the Mac too, so there’s nothing to do but connect it and go.
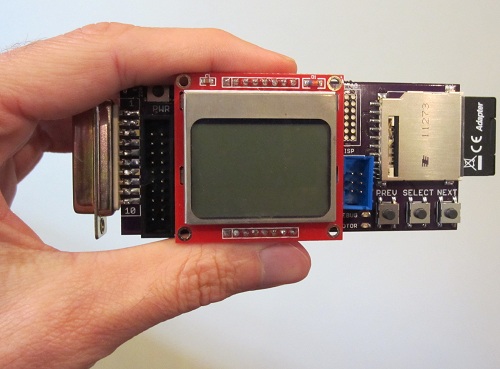
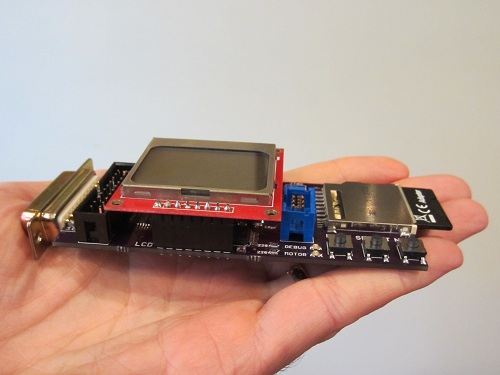
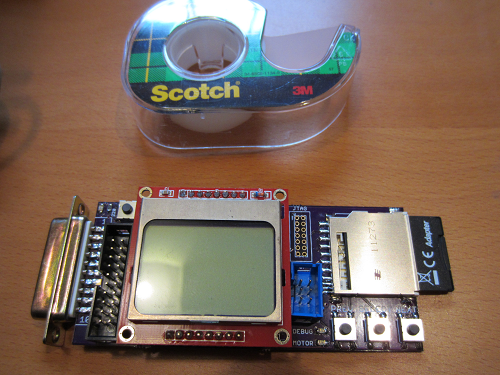
These photos show how small the Floppy Emu board is: about 1.75 inches wide and 4.5 inches long, including the DB-19 connector. The SD memory card extends an additional 0.5 inch beyond the end of the board. A roll of Scotch tape is also shown as a size reference. The Floppy Emu board is purple, but in most of the photos you’ll also see an LCD display on a red daughterboard. The LCD daughterboard is socketed, and can be connected and disconnected as needed. It’s the same Nokia 5110 LCD board sold by SparkFun and other several other vendors.
Thanks to its small size, the board fits nicely at the rear of the Mac, right between the mouse and the SCSI connector (or mouse and serial port on older Macs without SCSI).
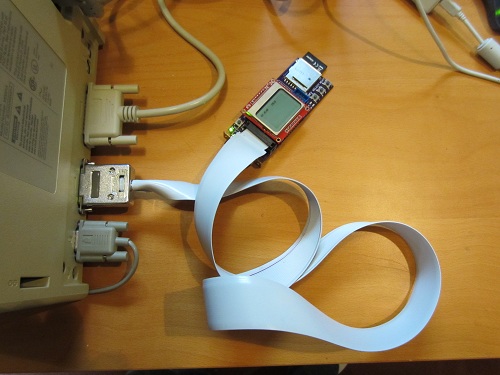
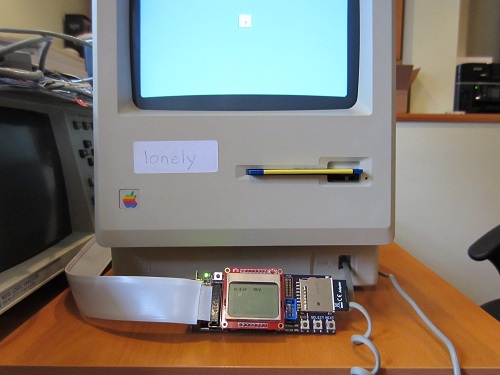
In addition to plugging straight into the external DB-19 floppy port, Floppy Emu can also be connected using a rectangular 20-pin IDC connector. This is the same connector found on the Mac motherboard, so a standard IDC cable can be used to connect Floppy Emu internally instead of at the external floppy connector. A DB-19 to IDC-20 adapter cable can also be used, such as the Apple II cable from IEC shown below. The cable enables Floppy Emu to connect to the external floppy port at the Mac’s rear, but positioned in the front of the Mac where it’s easier to use.
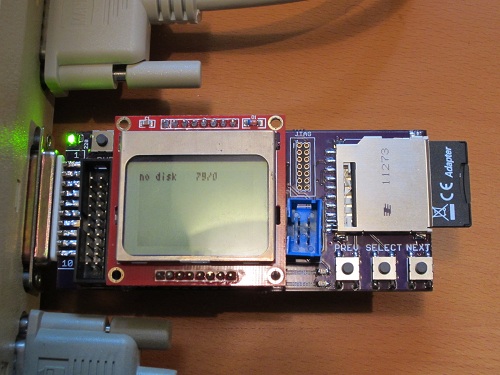
Everything is looking good so far. The next step is to program the CPLD, so communication with the Mac can be performed. The Floppy Emu board has a Xilinx JTAG connector at the upper-right of the LCD daughterboard, but it’s not populated and I’m hoping not to use it. Instead, my plan is save the CPLD configuration file on the SD memory card, and then use the microcontroller to configure the CPLD using a bit-bang JTAG method described in Xilinx app note XAPP058. Once that’s done, the final step will be to use the more powerful microcontroller on this board (as compared with the prototype) to experiment with new write emulation methods, and hopefully achieve 100% success for emulated floppy disk writes as well as reads.
Read 17 comments and join the conversation
17 Comments so far
Leave a reply. For customer support issues, please use the Customer Support link instead of writing comments.
Nice work!
Hope to see it working 😉
NIce! do you have a version for non-mac computers?
The Mac floppy interface is different from most other computers, so this is Mac-specific. For other computers, try the HxC floppy emulator: http://hxc2001.free.fr/floppy_drive_emulator/
Great job, nothing like interfacing with “ancient” tech! I can’t wait until it’s finished!
In one of your previous posts, you mentioned that you weren’t sure of the final CPLD and microprocessor you would use for production, are the chips you used here what you are going to stick with?
Yes, I’m hoping this will be the final hardware design.
Very very cool! Well done. Unfortunately I have no need for one now, but I can’t wait for the Amiga version 😉
Great hack and the final “product” has a nice look to it.
I’ve programmed the .bit files via JTAG from another micro without issues (for devices as large as XC2S200). Couple of points to keep in mind:
1) “Use JTAG clock for startup” must be checked during bitstream generation.
2) The bits with in the bit file are pushed in “backwards”. (ie. read bytes 0..3, you’d push in (b0 & 0x80) >> 7 first, (b3 & 0x01) << last).
Hope that helps!
Looks great Steve — I would really like to build one of these in the *near* future.
This is a very exciting project and looks like a ton of fun when you get things to work properly.
Too many outside life distractions keep pushing off further work on the floppy project. Sorry to those who are following this. I haven’t forgotten about it!
Nice work!
What is the new microcontroller your porting to?
Great!! This jingle will be a great step for humanity!
Hello. I am in the middle of making one for me.
I have used avrdude to flash the avr with:
avrdude -c usbtiny -p m1284p -e -V -U flash:w:floppyemu.hex
avrdude -c usbtiny -p m1284p -U lfuse:w:0xbf:m -U hfuse:w:0xd9:m -U efuse:w:0xff:m
The flashing did go just fine. However, now (2nd run) I have no contact to the avr
anymore. Most likely the fuses are not correct..? But I checked with fuse calculator and
the values given above should match..?
The problem here is to get parts that fits the footprint. So quarz is another 20MHz smd type.
(NOT an oscillator!)
Peter
Peter, you probably want to comment on the “build your own” page instead of here: http://www.bigmessowires.com/2012/12/15/build-your-own-floppy-emu/
Yes, you need a 20 MHz crystal, not an oscillator. The file archive contains Digikey links to the exact parts you need. The crystal is http://search.digikey.com/us/en/products/NX5032GA-20.000000MHZ-LN-CD-1/644-1039-1-ND/1128911 The fuse settings tell the AVR to use an external clock instead of its internal oscillator. If you don’t have that crystal in place yet, then the external clock is absent and the AVR will have no clock source and won’t run. After you connect the external clock, it should be OK.
@Steve: Thanks. The fuses were ok. Issue was that I had ordered a smd crystal with 4 pads und that gave a short on the crystal. Now temp. I have soldered a small HC49 crystal and it seems to work.. need to wait now on the 5110 displays from china 😉
Problem is that parts from digikey are quite expensive in germany, because of shipping costs..
So I tried to use similiar parts.
Will keep you updated when missing parts have arrived.
Thx. Peter
If you find good sources in Europe for the parts, let me know the part numbers and I’ll add them to the docs.