Internal/External Drive Switcher for Apple IIc
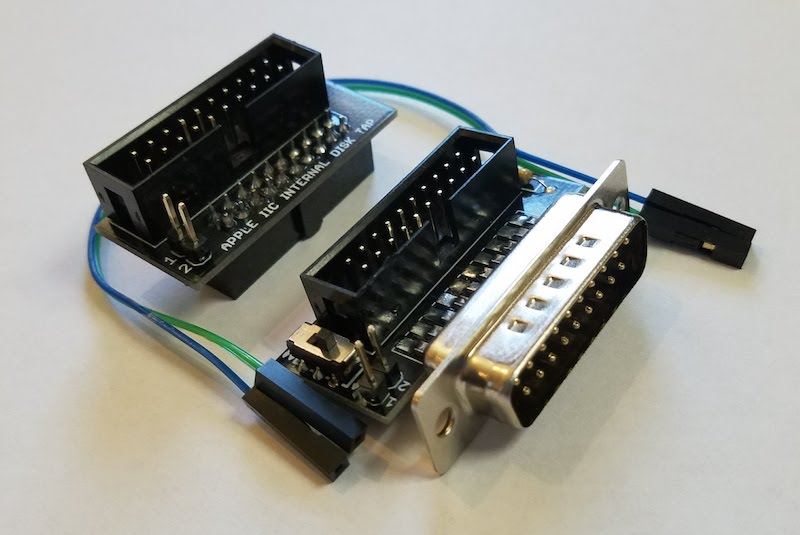
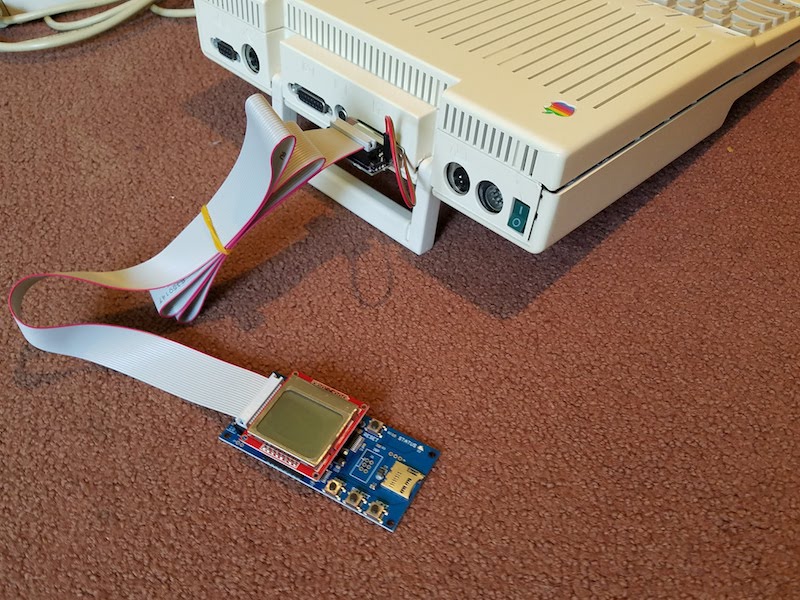
The Internal/External Drive Switcher is a two-piece adapter for the Apple IIc, providing an easy way to select which floppy drive will act as Drive 1, with optional support for two external floppy drives. It’s a convenience option for the IIc, which normally can only boot from its internal 5.25 inch floppy drive.
In the Drive Switcher’s “swapped” mode, an external Floppy Emu disk emulator will act as Drive 1, and the internal floppy drive will act as Drive 2. In normal mode, the internal floppy will act as Drive 1 and Floppy Emu as Drive 2. In dual external mode, an external Floppy Emu with Dual 5.25 Emulation Mode will act as both Drive 1 and Drive 2.
Buy an Internal/External Drive Switcher for Apple IIc at the BMOW Store
The Drive Switcher isn’t required, but it makes everything more convenient for a Floppy Emu on the Apple IIc, when emulating a 5.25 inch floppy disk drive. Before now, the best option was to disconnect the internal floppy drive, and connect the Floppy Emu to Apple IIc the motherboard. While this worked fine for the Floppy Emu, it meant IIc owners forfeited their ability to use the internal drive. With the introduction of the Drive Switcher, IIc owners now have the best of both options.
The Apple IIc’s boot drive limitation only applies to an external 5.25 inch floppy drive. An external Unidisk 3.5 drive or Smartport hard drive (like Floppy Emu when configured for Smartport hard disk emulation mode) can boot the Apple IIc without the aid of the Disk Switcher, or with the Disk Switcher when in its normal mode.
INSTALLATION INSTRUCTIONS
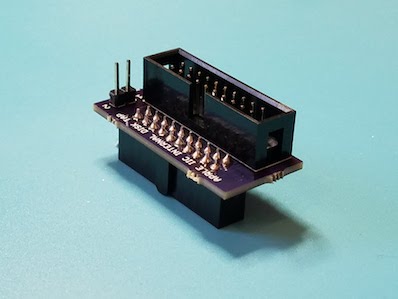
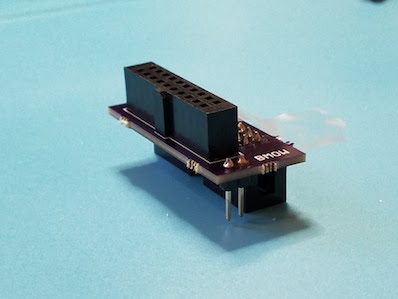
This is a two-part device: a signal tap that should be installed inside the Apple IIc, and a modified DB19 adapter with two slide switches for the external connection. Two female-female jumper wires are passed through a gap in the case to make the connection between the two parts.
Both parts of the Drive Switcher must be installed and connected. If you try to use one part without the other, or without the wires that connect the two parts, then neither the internal drive nor the external Floppy Emu drive will work correctly.
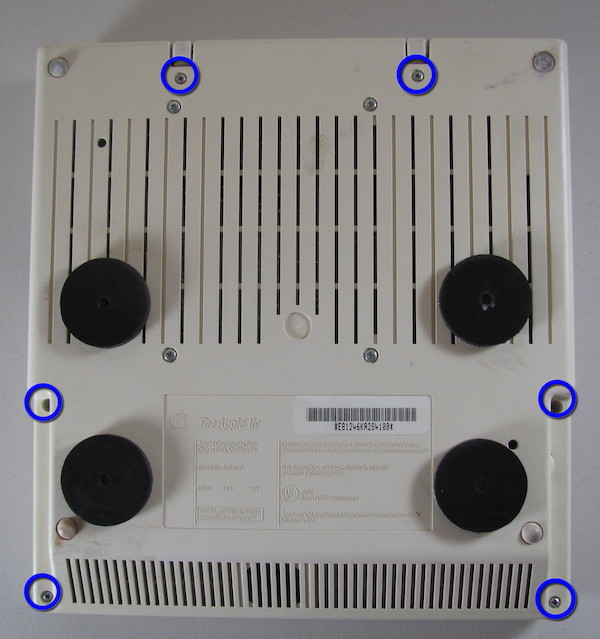
Step 1 is to remove the top panel from the Apple IIc. Remove the six screws from the bottom of the IIc case, and use a blunt tool to bend the tab that holds together the bottom and top panels. This tab is located below the N key on the keyboard. Then separate the top and bottom panels. See this iFixit guide for more details on opening the Apple IIc case.
Locate the ribbon cable that connects the internal floppy drive to the motherboard.
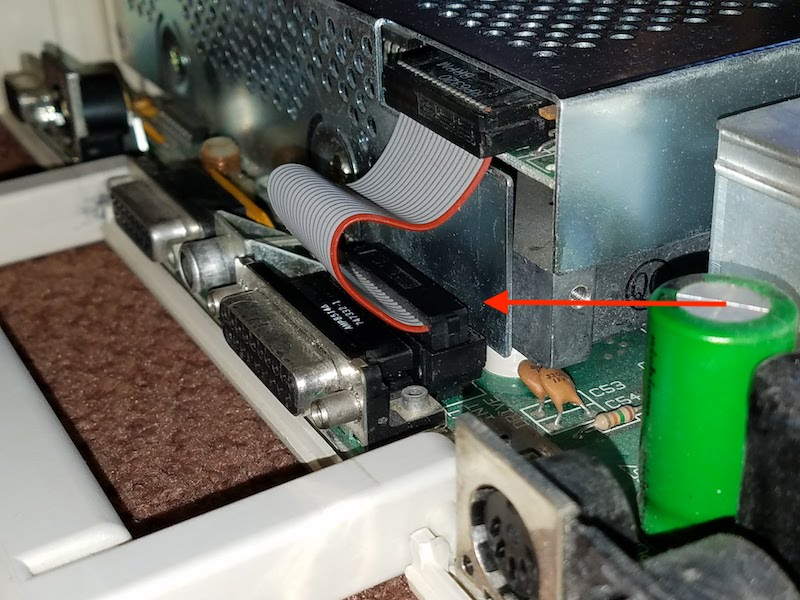
Disconnect the ribbon cable from the motherboard, and plug the signal tap into the motherboard in its place.
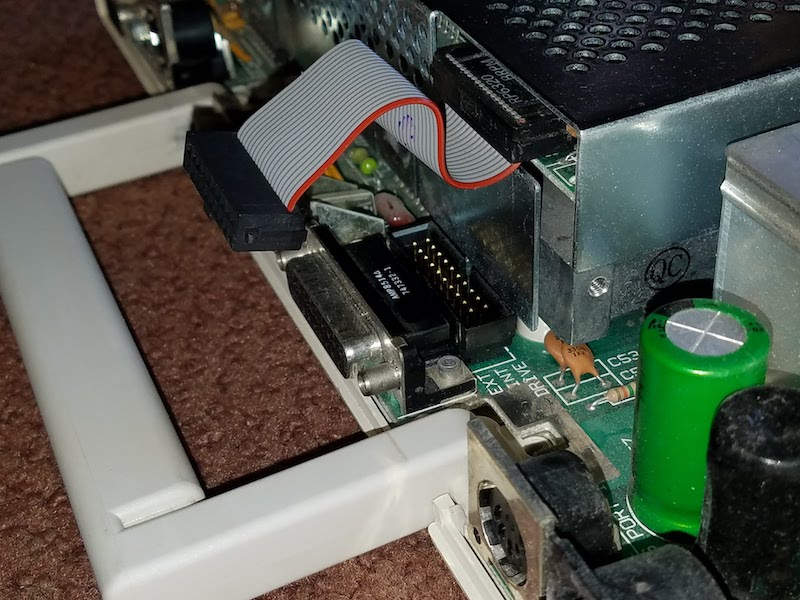
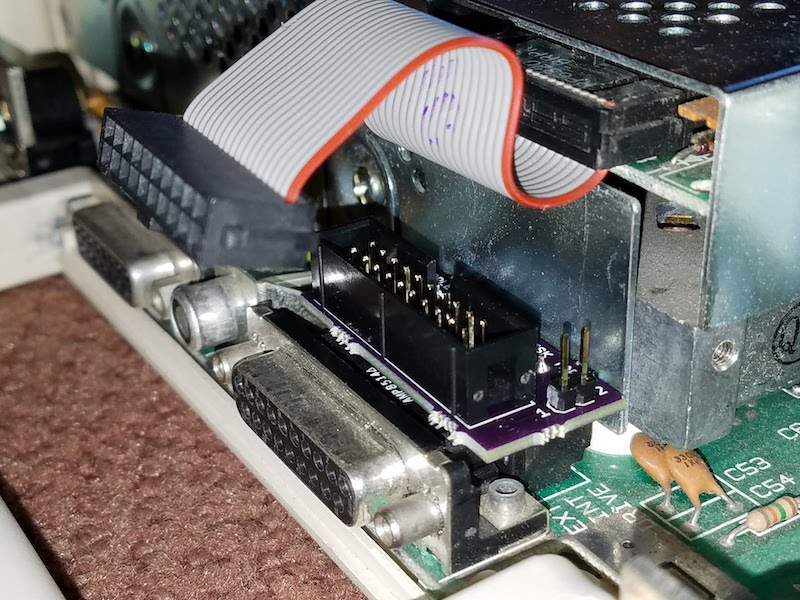

WARNING!
Be certain the signal tap board is centered correctly over the 2 x 10 male connector on the motherboard! When plugging the signal tap into the motherboard, verify that all 20 pins are aligned with the female connector on the bottom of the signal tap. Do not leave any pins uncovered on the left or right sides.
Misalignment will damage your internal drive, Floppy Emu, and IIc.
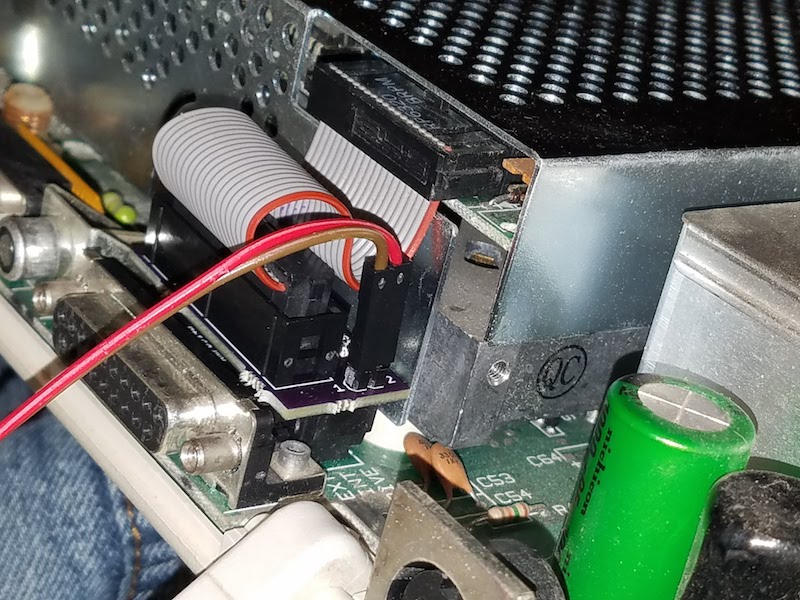
Now connect the ribbon cable to the top of the signal tap. Also connect one end of each jumper wire to one of the signal tap’s male header pins. Here I chose to connect the brown wire to pin 1, and the red wire to pin 2. I’ll need to make the same choice later for the external jumper wire connections.
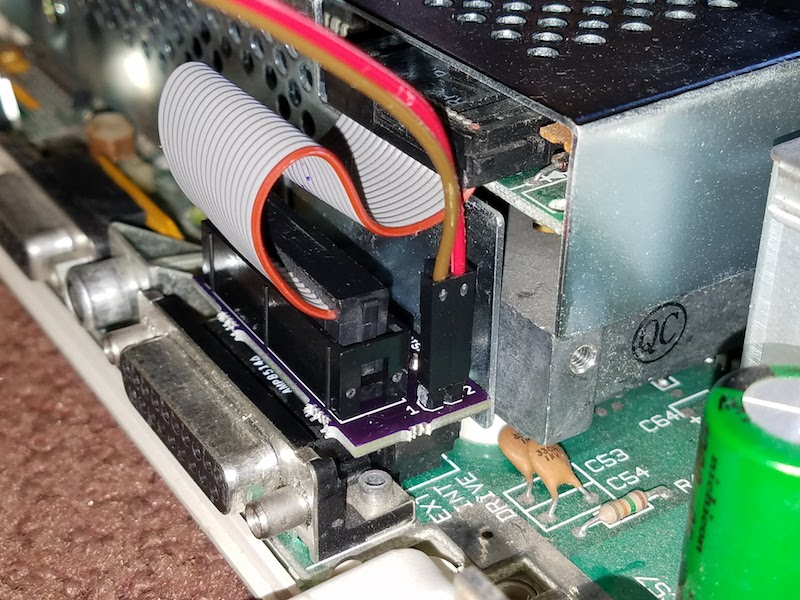
Before closing the case, it’s important to squish the ribbon cable down into the gap between the signal tap and internal floppy drive bracket. Push it down as far as it will go. This will make it easier to fit the top cover back on later. Notice the difference between the ribbon cable position in this photo as compared to the previous one:
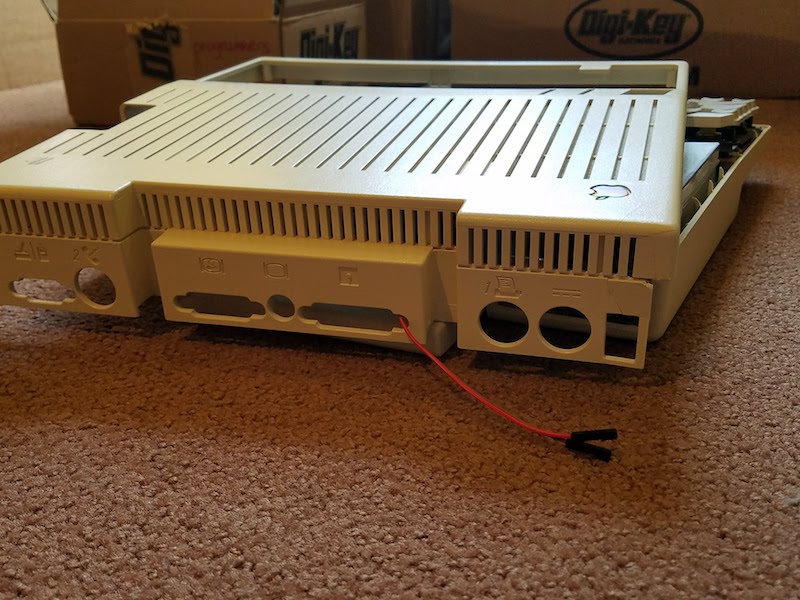
Now it’s time to close the case. First, set the top panel loosely on the IIc, and thread the jumper wires through an opening in the rear of the case. In the photo, the wires are threaded through the opening for the DB19 disk connector, but I prefer using the opening for the DB15 RGB monitor connector. Or use the opening for the printer port or the composite video connector.
Then reinstall the top panel. It’s a snug fit, but there’s a large enough gap between the top panel and the rear connectors for the jumper wires to squeeze through. After the top panel is reinstalled, it should look roughly like this, depending on which opening you chose:
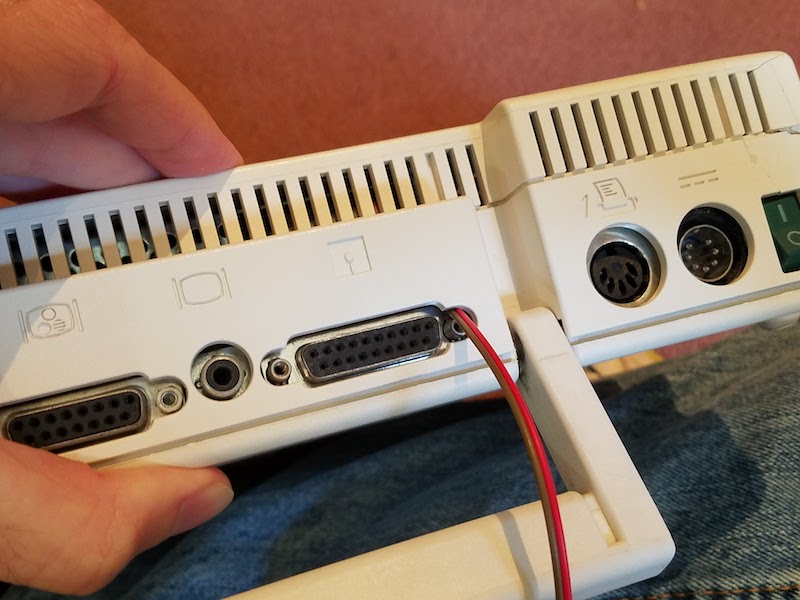
Connect the jumper wires to the 2-pin male header on the switched DB19 adapter, remembering to use the same color-to-pin mapping as before. Pin 1 of the internal board connects to pin 1 of the external board, and pin 2 connects to pin 2.
Then plug the DB19 adapter into the Apple IIc’s external disk port. It will replace the standard DB19 adapter that’s included with the Floppy Emu.
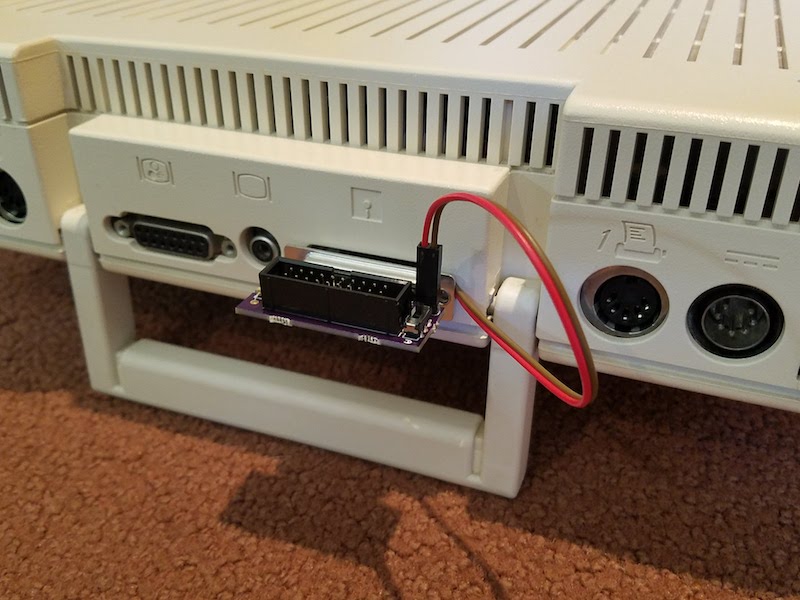
Finally, connect the Floppy Emu’s 20-pin ribbon cable to the switched DB19 adapter. All done!
The two switches on the external DB19 adapter are labeled with icons. The icon with an arrow pointing into a circle means internal, and the arrow pointing out of a circle means external.
Switch one selects which drive should be Drive 1: In “swapped” mode the external drive acts as Drive 1, and in “normal” mode the internal drive acts as Drive 1. Switch two enables the “dual external 5.25” mode. When enabled, an external Floppy Emu Model C whose current emulation mode is configured for Dual 5.25 will act as both Drive 1 and Drive 2, and the Apple IIc’s internal floppy drive will be disabled. See the table below for the switch settings:

| BEHAVIOR | SWITCH ONE | SWITCH TWO |
|---|---|---|
| Swapped Mode Drive 1 is external, Drive 2 is internal |
 |
 |
| Normal Mode Drive 1 is internal, Drive 2 is external, default Apple IIc behavior |
 |
 |
| Dual External 5.25 Mode Drive 1 and Drive 2 are external, requires Floppy Emu Model C configured for Dual 5.25 emulation mode |
 |
 |
| Invalid setting, do not use |  |
 |
44 Comments so far
Leave a reply. For customer support issues, please use the Customer Support link instead of writing comments.


I just picked up the floppy emu for my IIc It works fantastic. Thanks for your ingenuity Steve. I would also be interested in the switcher as well.
Hi, with this adapter you can use together the disk unit as well as the floppy emu.
Regards
Do you think this could be used on a Laser 128 (IIc clone)?
The problem is that the floppy interface is not socketed on the Laser 128 board- rather, there is a cable soldered directly to it. I’d have to plug the male side of the switcher into that cable, and then plug the female side of it into the drive, i.e, the opposite of connecting to a IIc.
Assuming I can make it physically fit in the case, I figure if the switcher is really just acting as a simple switch, that might be fine, but I’m not really sure.
The hardware swaps the enable signals from the internal disk header and the external disk DB19 connector, so the external enable signal goes to the internal drive and vice-versa. I have no direct experience with the Laser 128, but it sounds like it should probably work assuming that it physically fits in the case.
I did some testing with this unit on the Laser 128EX. Hooked up according to the above, and switched to ‘Swapped’, it could not read anything on the Floppy EMU. It is not compatible unfortunately.
RJ, can you email me some photos of all the connections made on your Laser 128? I also have some follow-up questions.
is it possible to toggle while the computer is running or will that cause issues? For example if I boot in swapped mode then want to change to internal as disk 1 could I just hit the switch or would I need to shutdown toggle then turn it back on. Thanks
Live switching should be OK if the external and internal disks are both 5.25 inch, and there’s no disk activity when you make the switch. But I can’t think of a reason why it would be necessary to switch after booting.
Will this work for the C plus or is it even necessary since it will boot from an external 5.25 drive on it’s own?
It’s not necessary for the IIc+.
It’s still coming – probably about one more week.
Can an external floppy drive still be added on port 7 with this modification? It looks like you’re replacing the original disk connector to connect the emu to port 6 as an override for the internal drive. Would the daisy chain board you have work here to connect a second floppy drive? Basically what I’d like to do is copy a bunch of existing data disks to disk images on the Emu board, so I’d still need to have a working physical disk drive to use for the source disks and somehow can’t wrap my brain around how this would work (it’s probably lack of sleep, I ran out of coffee today)
@Brian this product is for the Apple //c, which doesn’t have hard-numbered slots or disk ports. It provides a switch that can logically swap the internal and external disk connectors if desired, which makes it easier to boot from 5.25 inch disk images on the Floppy Emu. You will always have access to the internal 5.25 drive of the //c; the switch setting just determines where it will appear in the slot/drive number mapping.
@Steve Did you ever follow up with RJ on the Laser 128?
I just tried it out in my Laser 128EX here, and it wasn’t working- straight through was fine, but swapped would boot nothing.
On a hunch, I reversed the direction of the jumper cable, and it works now. I triple-checked, and the jumper cable really is reversed between the two ends. But it works.
I’m not sure what that means- I suppose I could sketch out a schematic and try to reason through it, but I’m feeling lazy tonight. I guess something must be reversed between the way the IIc and Laser use the enable line..?
I do have one design suggestion to make in order to have the thing fit better in the Laser, if that’s something you’d be interested in supporting (it’s hard to explain, if you could reduce the dimension of the PCB very slightly in one direction, it would fit better. I can send a picture if you want).
Yes, I did reach the same conclusion with RJ: The Laser 128 requires reversing the 2-wire cable on one end. However he also reported some problems with Smartport HD emulation. I never heard whether he traced it to the Internal/External Switcher, or if it was a general Laser 128 issue, or something else. You can use the Contact link at the page’s upper-right if you want to send me some diagrams.
Steve/Renee – would it be possible to send a few pictures of how this was installed in a Laser 128? I am in the middle of restoring mine and bought one of these to add in, since based on the comments above, it seems like it works. Would be great to effectively use my Floppy Emu with the Laser. Thanks!!
I don’t have a photo, but it’s as described in the previous comment: for the Laser 128 the internal signal tap module plugs into the floppy drive instead of the motherboard, and the cable connection must also be reversed.
Hey Steve,
Using the directions for the IIc, plus the comments, I installed the switcher in my Laser 128 (not EX model). The internal signal tap module is plugged directly into the floppy drive, with the red wire/Pin 1 from ribbon cable aligned to the right when looking at the back of the drive. As mentioned about I reversed the two wire cable connection i.e. red wire is on pin 1 on internal tap, on pin 2 on external. I’m getting a “Check PIN CLKO-L” error. Doing some searching and reading through the documentation, the only thing I could find was a post you had around SD card compatibility. This is the SD card you sent with the bundle, and it did work perfectly with my IIgs. It also worked on the Laser, when I was using it to emulate a 3.5″ external drive. Any thoughts/suggestions? Thank you!
Hmm, is the Floppy Emu set to 5.25 inch floppy drive emulation mode? That CLKO message is part of the self-test, but it can also be triggered if the disk I/Os are in an unexpected state at power-up. I don’t own a Laser 128, but based on reports from other Laser users, what you’re doing sounds correct.
Just curious as to when you are expecting to have these back in stock. Looking to get the Emu and this at the same time.
I expect to have more stock available in a couple of weeks.
Hello,
what happens if the wires are no corrected correctly inside and outside, I mean e.g. brown wire connected internally to pin 1 but externally connected to pin 2?
Is there a risk of damage?
I think I have done such wrong connection, and now it seems I can’t no longer boot on internal disk when configured back as internal, even if it is still recognized and so working correctly when configured as external drive.
Thanks.
Olivier.
Depending on the switch setting, this might connect the computer’s internal and external disk enable signals on the same wire. If you’re still having trouble with this, please use the Customer Support link for 1-on-1 help.
Just received my floppy emu bundle and iic switcher. Thanks for the quick shipping. Floppy Emu rocks! no more making disks with ADTPro for me :)…One question. Once I have installed the switcher, does that mean I can’t hook up the apple external 5 1/2 drive anymore? I don’t know I would ever have a need to, but since the instructions say you always have to use both the internal and external parts, I am thinking that rules out the drive?
Thanks for a great product!
If you need to temporarily plug in a real external drive instead of the Floppy Emu emulator, you can unplug the external part of the Switcher from the rear of the Apple IIc, but leave the two wires on the external part connected to the internal part. In this case, the switch should be set to the straight-through / unswitched position.
Hi Steve,
Received Apple IIc switcher and floppy EMU, both work awesome. Your innovation has brought new life to my IIc that has been in storage since 1990. I have one question for you; Can the EMU be plugged into the 3.5″ unidisk as opposed to the switcher if the switcher is installed. I have the EMU working as a 5.25 floppy, 3.5 unidisk floppy and hard drive all plugged into back of switcher. I cannot seem to make it work as a HDD plugged into back of unidisk with unidisk plugged into back of IIc and external piece of switcher unplugged.
Thanks,
Jon
If the external portion of the Switcher isn’t plugged in, then you lose the ability to perform drive switching. You’d probably be better off not using the Drive Switcher at all, unless you want to use the Unidisk 3.5 sometimes and the Floppy Emu other times, without needing to add/remove the Switcher every time.
Both parts of the Drive Switcher must be installed and connected in order for any drives to run. If you need to connect something to the back of the IIc other than your Floppy Emu, you can unplug the external part of the Switcher, but still leave its two wires on the external part connected to the internal part. But in this case, the switch must be set to the straight-through / unswitched position, and you lose the ability to perform drive switching. It’s basically the same as not having the Drive Switcher.
Both the Unidisk 3.5 and the Floppy Emu will work in this setup, but if the Floppy Emu is configured to emulate a 5.25 inch floppy drive, it will be 5.25 inch Drive 2. If the Floppy Emu is configured to emulate a Smartport hard drive, then both drives will work so long as you have a Model C and the SPDC firmware variant is installed on the Emu.
Hi Steve! I purchased the floppy EMU for my Apple iic a couple of weeks ago. It works great! Any chance the Switcher will be back in stock soon? I’d like to get one as soon as possible. 🙂 Thanks!
More IIc Switchers are coming, but they’re stuck in the vortex between the global semiconductor shortage, international shipping backlogs, and COVID lockdown in Shanghai. It’s a difficult time to be manufacturing electronic gizmos.
Hey Steve…
Firing up the switcher, I have successfully booted DOS 3.3 using the internal drive 1, FEmu as drive 2 – the Normal mode, default configuration 2 above. I can access the FEmu as D2, CATALOG, run files and games, etc. No problem there.
However, I cannot get the IIc to boot DOS 3.3 from the FEmu, no matter what configuration I use. I figured that Swapped mode should work (with the FEmu configured for 5.25” disk), as should Dual External (again, with the FEmu configured for dual disk), but neither will boot the IIc, the disk remains idle.
What am I doing wrong?
Thanks very much for the help!
Patrick
It sounds like the drive swapping function isn’t working, possibly because something isn’t connected as expected with the internal and external parts or the wires between them. You can use the Customer Support link at top-right if you need individual troubleshooting help.
Follow-up…
I suck.
Thanks for getting back to me, Steve!
Patrick
Hi Steve,
Is it necessary for an Apple Ilc with ROM 4X?
Thanks for your answer and kind regards
Christophe
Does ROM 4X already include a switching feature? I haven’t used it. If it does, you might still want the BMOW IIc Switcher to take advantage of Floppy Emu’s dual 5.25 floppy emulation mode on the Apple IIc.
I have an apple IIC with rom4x….while that rom allows you to boot from an external drive (like the floppy emu), I still needed the switcher. The internal drive is drive 0 and the external is drive 1. I found that a bunch of programs look to be running from drive 0…so while they boot from the external, then they spin up the internal drive and fail.
Just wondering how to make the 2c boot off smart port hdd for floppy emu. I have been trying but it just doesn’t work. Booting off of emulated floppy disks works fine.
The IIc needs to have a ROM that supports Smartport disks. Please see “Smartport Hard Disk Emulation” in section 5 of the instructions.
Thanks for the info. My emu and and switcher are working great otherwise, thank you for everything you do for this community.
Turns out I have a rom 255 version. That’s fun… I guess I will just have to deal with that for now. Should be a ungraded I perform in future
Will this work for the Compact Mac 512K?
No, it’s specifically for the Apple IIc to address a disk drive limitation in that computer.
Hi Steve, I just purchased a few of your amazing products…Awesome stuff. I got the Floppy EMU first, then the Yellowstone card and now the switcher.
I have an Apple 2+ and an Apple 2C here…and another 2+ that I am trying to fix.
I also happen to own a perfectly working Laser 128 that came from my Dad’s house and survived a house fire…amazing it works but it tests good.
It’s just a bit soot covered but plan on disassemble to clean. In that process, I may also want a switcher for this unit. I read all the comments above.
I am ALSO very happy to see you are in the Bay Area, as am i. Do you allow drop-ins? Can I arrange a time to visit and I can loan you this Laser 128 if you need to see one for testing. Just a thought. I am just a few miles south of you and I want to compliment you on 2 day fast shipping…nice to be local. Thank you.
Steve, your products are fantastic!
I recently bought the switcher and was curious if a 5.25-inch floppy drive could be connected directly to it instead of using the Floppy Emu. I wanted to try having two floppy drives. Unfortunately, I couldn’t get it to work.
Yes, the IIc Switcher is designed for the Floppy Emu and doesn’t provide power for a mechanical disk drive. For a regular 5.25 inch floppy drive, you can just plug it in normally and a device like the IIc Switcher isn’t needed.