

3D Printed Floppy Emu Case Experiment
My clear acrylic laser-cut case design for Floppy Emu looks sharp, but doesn’t match the visual style of classic Apple II or Macintosh systems. It’s also a bit tedious to assemble. A few people have suggested a Floppy Emu case that looks more like a retro 3.5 or 5.25 inch Apple drive, with Apple design details and a beige/white color. In that spirit, my friend Allan recently did some experiments with a 3D printed white case for the Floppy Emu, and the results look promising.
3D printing has the advantage of making any shape possible, instead of being constrained to interlocking 2D pieces with laser cutting. This enables the case to be built as just two pieces, rather than the six pieces needed for the laser-cut version. It also enables the button plungers to be built directly into the top plate, so they can’t fall out, making the whole thing easy to assemble. If you’ve struggled with the button plungers in the laser cut case, then you’ll appreciate this.
With 3D printing, it’s also possible to approach the appearance of a retro computer accessory. The case can be matte white, instead of glossy acrylic. 3D grooves and other small details can be modeled directly into the case, instead of being limited to 2D etching. Nobody will confuse it with a 1984 Apple peripheral, but at least it will be a lot closer.
I’ve mostly avoided 3D printing until now, because I’ve found it to be slow, expensive, and imprecise. Each one of these test prints required many hours of printer time and baby-sitting. The large time sink wouldn’t an issue if I used a commercial 3D printing service instead of home printing, but initial estimates are that a 3D printed case would cost perhaps 3x as much to manufacture as the current laser-cut case design. Maybe that would still be OK if the improved appearance and ease of assembly made it worth the extra cost to customers, but it’s a lot to ask.
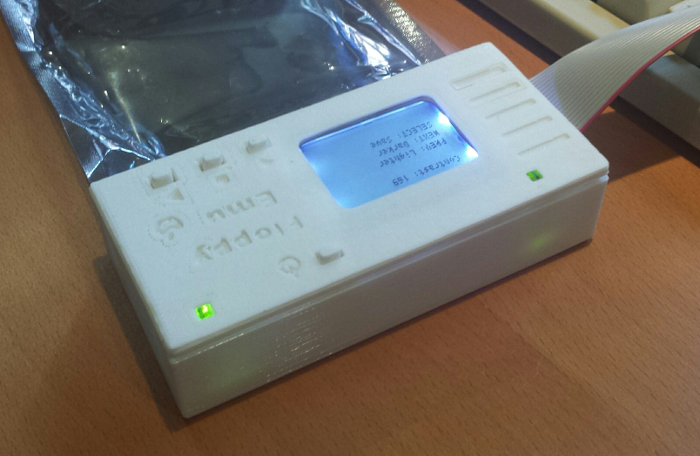
Imprecision has been my biggest concern with 3D printing. Using my own budget printer, it seems half the prints I make come out badly deformed. Even the “good” prints always have a smooshed corner or deformed detail or other minor problem. It’s not terrible if you’re making a prototype for self-use, but I’m not sure it would be acceptable if making hundreds of them for sale to customers. Allan’s first case experiments showed some of the same types of deformities, although he was able to improve it somewhat in later iterations by making adjustments to his printer settings. Here’s an example of what I’m talking about:
Note how some of the grooves at left aren’t clean and even, and there’s a diagonal texturing across the whole surface that’s visible in some areas but not others. It’s hard to see in the photo, but the text and icons also have a slightly uneven appearance.
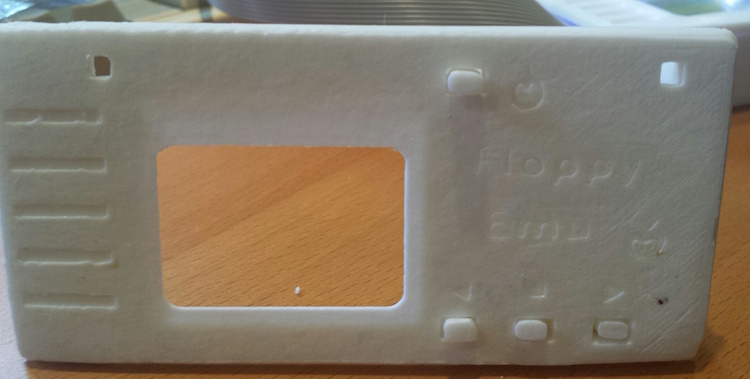
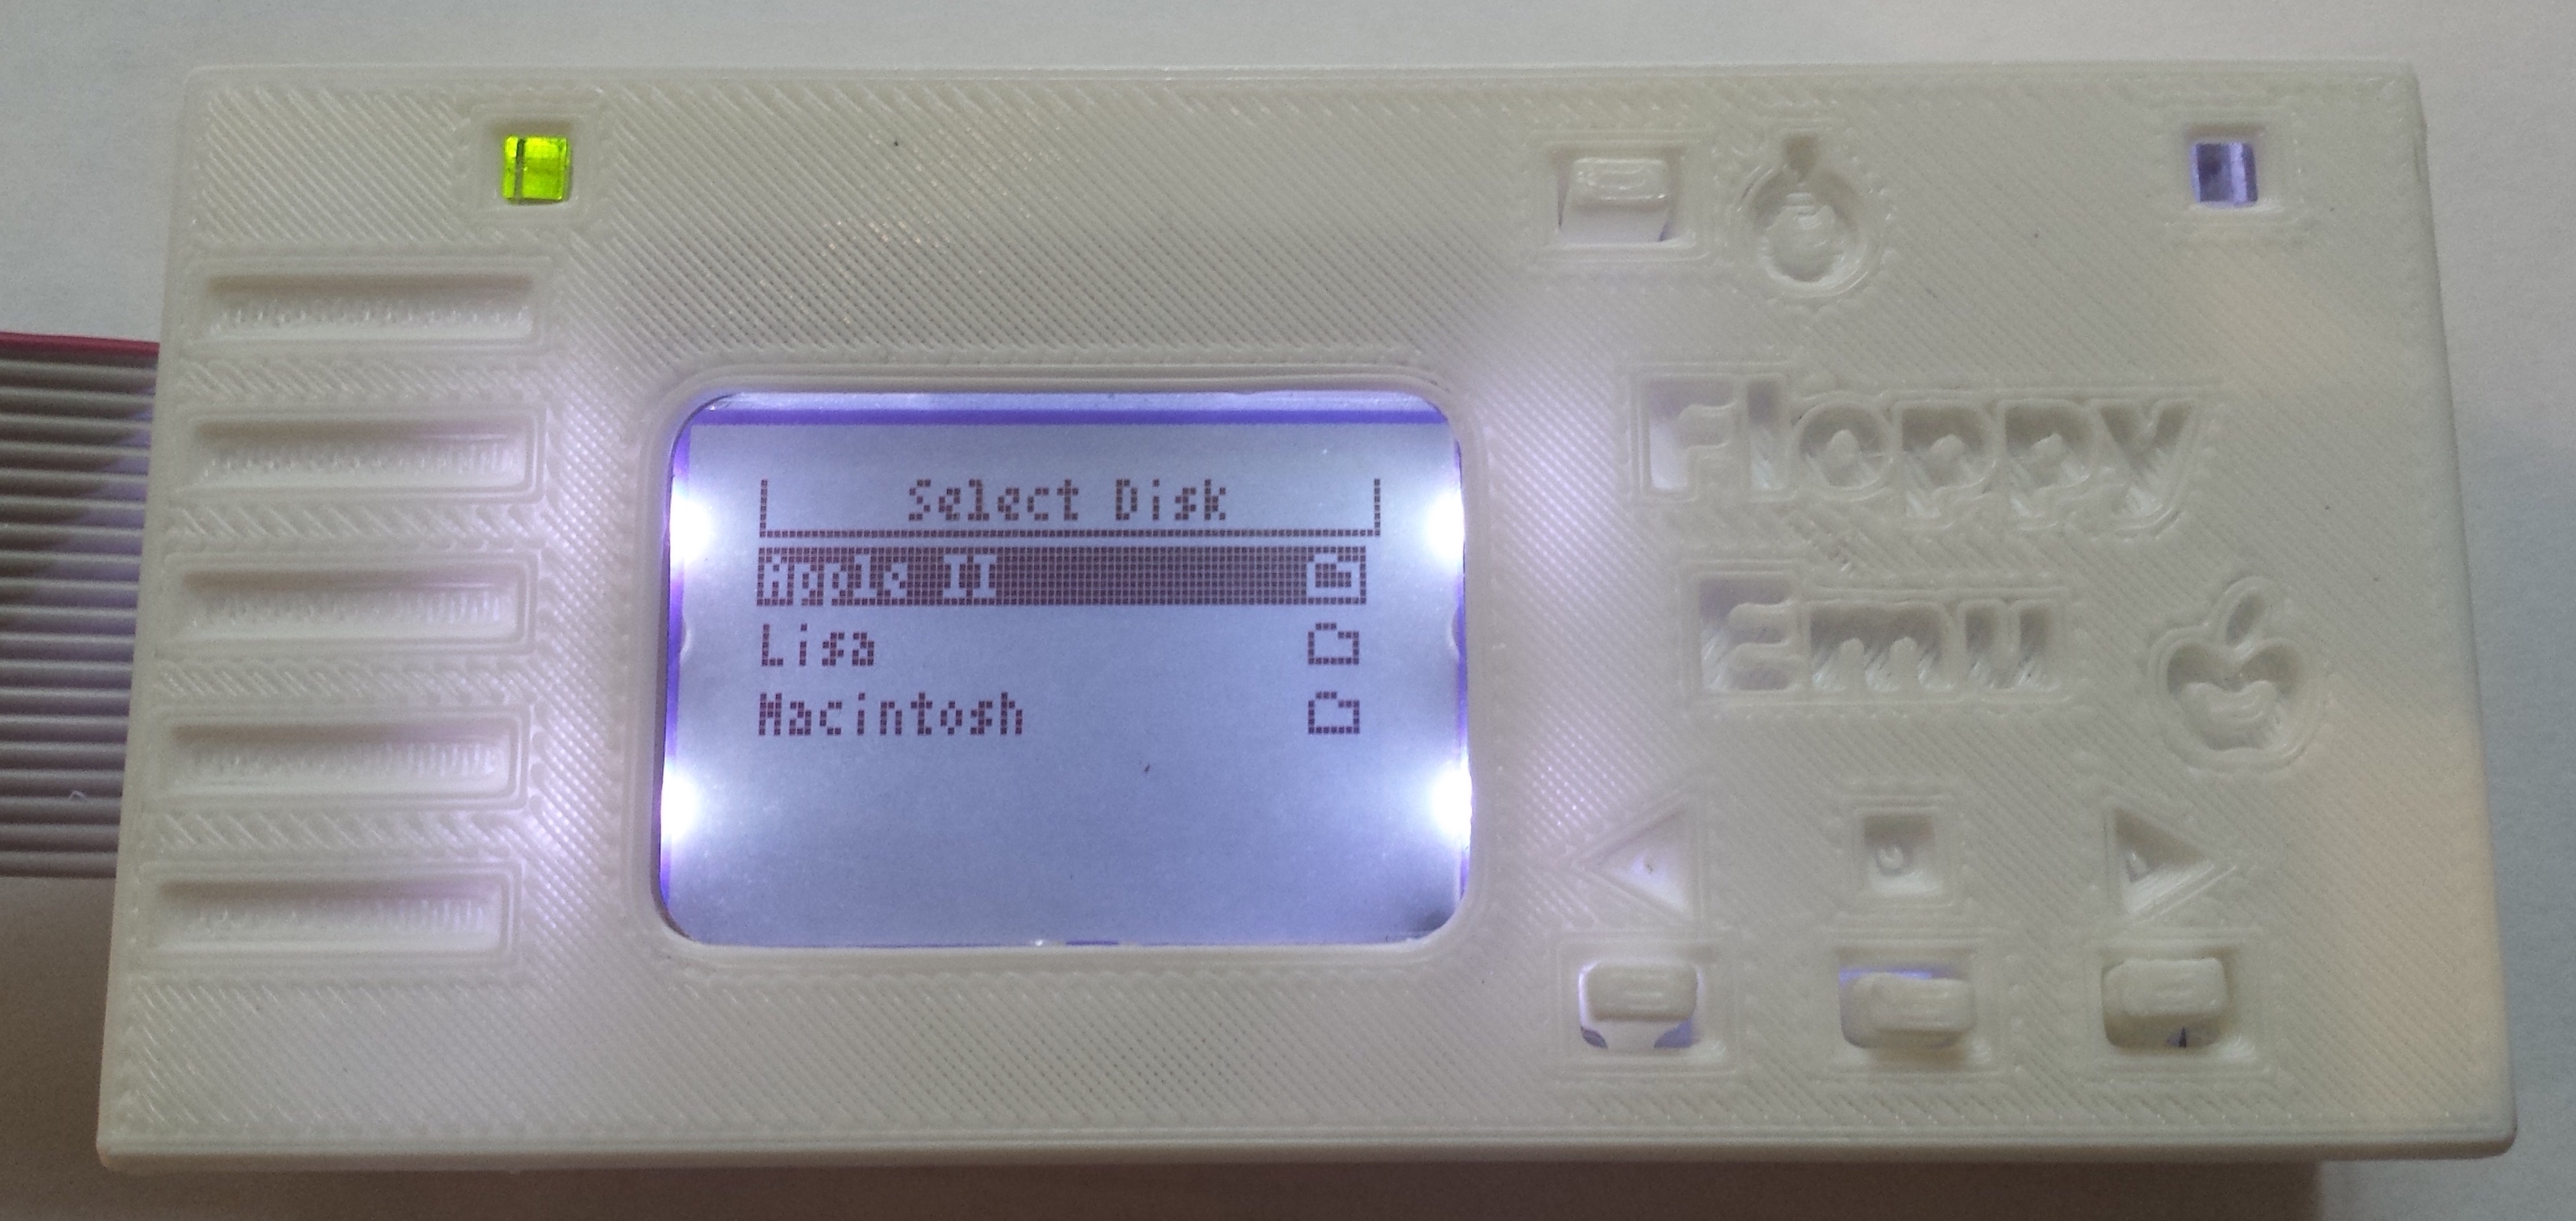
What surprised me was a test print made in Allan’s friend’s high-end 3D printer: it’s much more professional-looking, with very consistent print appearance across the whole case. That’s the print you see in the title photo above. I don’t know exactly what model of printer it was, or the cost, but I’ll try to find out. Here’s a close-up of the case from the better 3D printer, for comparison (click the image to see a high-resolution version).
A question to readers: would a 3D printed “retro-style” Floppy Emu case interest you? What features do you think would be most important? What do you think would be a fair price for something like this?
Read 15 comments and join the conversation15 Comments so far
Leave a reply. For customer support issues, please use the Customer Support link instead of writing comments.
I personally prefer laser cut over 3D printed, the finish is just much more professional. Have you tried finding something other than acrylic to cut? I have a test sheet here of light gray Kydex which is a dead ringer for classic computer plastic, texture and all, but it’s chlorinated so you can’t cut it with a regular laser cutter.
It’d also be fun experiment to take an opaque gray acrylic sheet and etch a random noise pattern onto the surface, it seems like it could be a decent match for classic Apple plastic.
I’m not a fan of the roughness of 3D printing– I haven’t yet seen a 3D printed something that didn’t *look* like it was printed. But if you’re going for a plastic case reminiscent of an Apple drive, then I would say keep the Snow White “grooves” but rather than carve emblems and writing into it, silkscreen “Floppy Emu” onto the plastic in Garamond font as with the clear acrylic version.
I could never get my patience level high enough to put the acrylic one together. All the pieces are just sitting in a zip lock bag. I would gladly buy something like this, especially if it’s a 2 piece deal that you just put the floppyEMU in. If you have any prototypes you don’t care for, I’ll give you my address!!!!
I think you’re on the right track. But instead of 3D-printing why not build a casting mould? If the finish would match the ones by Frog Design I’d pay 100 USD for it.
Unfortunately a custom mold costs many thousands of dollars to create, and is only practical for moderate-to-high volume manufacturing.
Oh, and I love the acrylic case. The fact that it doesn’t try to mimic any specific Apple hardware makes it a genuine piece that goes well with anything.
Maybe ask this guy what he used: http://pcedric3.free.fr/SmartportVHD/news.html
That case looks way too nice to be 3D printed. I can’t imagine him paying a ton of money to get plastic molds made.
That looks like a generic molded box enclosure, then he used a milling machine to cut all the necessary openings in it (there are photos of his milling machine setup). I emailed him to ask if he had more details on how it was made.
If I were starting over from scratch, I might select a pre-made generic plastic enclosure first, and then design the PCB and its button and LED locations around that. But it’s too late for that now.
There are also some companies that supposedly have a “toolless” process, where they can build a basic box enclosure to any given dimension without requiring a mold or tooling. Then they use CNC milling to cut the holes for buttons and slots and things. I’m not sure how expensive that might be – I tried to get a quote, but couldn’t find a way to get a quick-and-dirty cost estimate. That method would still omit the button plungers and light pipes, though, so those parts would have to made with another process. The button plungers especially are a real pain in the neck, and I haven’t found any simple and reliable way to attach them to the top panel of the enclosure.
I think laser cutting is still the only method that really makes economic sense, given my sales volumes and the need to fit an already-existing PCB design. I’ve ordered a few new laser-cut prototypes using different materials and artistic styles, and they should be ready soon. Hopefully one of them will be a nice improvement. I’m optimistic that 3D printing will also be viable as a second option. I don’t think 3D printed enclosures will replace laser-cut as the default option, but they may be a good alternative for people who want that kind of style and an easier enclosure assembly process, in exchange for a somewhat higher enclosure cost.
I have a lot of new-found respect for pros in this field. It’s much more complex than I ever would have guessed just to make a “simple box”.
I like the acrylic case, but have dropped the microSD card inside far too many times. I then get to play either a game of labyrinth trying to wriggle it out, or sometimes it’s 3D puzzle time. I really wish the model B used a standard sized SD card. I really, REALLY liked the wood cases you had, but was unable to get in on any of those. 🙁
I do like the look of the acrylic case personally, but those button stalks really are a pain! On mine, the case is a little too loose so the stalks are very wobbly and they keep falling off the buttons, I’ve also managed to snap my front plate in an effort to try and reduce that looseness. But I’m also not a huge fan of the rough look of a 3d printed case, so I think I’d prefer the laser cut one still since it’s more aesthetically pleasing.
Maybe a re-designed case with more support for the stalks would be a good idea? I don’t know how you would do it, but I think that would make a lot of people happy! I’m not complaining too much though, I’m still a big fan of the Floppy Emu in general!
Can you just use tactile switched with long stalks that protrude through the case holes? I’ve seen them at least half an inch long.
@Nick sorry you’ve had trouble with the buttons on yours. I’ll check if I have a spare top piece for you. Some past cases were cut from material very slightly thinner than normal, causing slippery button stalks. A dot of glue on the bottom of the stalk helps if they’re very loose, or a piece of clear tape on the side of the stalk (reduces its ability to hinge in the top piece). @Murdock I did look at extra-tall tactile switches, but many people use the Emu board without a case, so the push-button design can’t assume a case is present. I’ve revisited the laser-cut button stalks a few time since the original design, and I’m fairly certain it’s about the best solution possible given the limitations of a 2D process with a 15% material thickness tolerance. Some minor tweaks of width or height may help a bit, though, so I’ll continue experimenting…
I made this one, crudely modified for my Model A: https://www.thingiverse.com/thing:1376359
I’m only using the base, as the top registration was way off for my printer. But it stops the circuit board from catching on things, so it’s better than nothing.
I realize this post is really old but did you ever release the plans for a 3D printed case? Thanks
Thank you very much for your analysis. Our company is also engaged in making products from 3D drawings . Our company’s website is https://zetarindustry.com.We are happy to serve you.Welcome to contact us.