

Pogo Pin Test Board for ADB-USB Wombat

Here’s a test rig for the ADB-USB Wombat board: my first-ever project whose sole purpose is to facilitate testing of another project. It uses spring-loaded pogo pins to create a bed of nails that fit into test points on the Wombat board. I can drop a new Wombat board onto the tester, clamp it in, and then program and test it with just a few button clicks. This is a huge improvement over my old manual testing method, which involved multiple cable connections and disconnections, and hand-verified keyboard/mouse emulation on two separate computers. That sort of test process is fine for building a few units, but something faster and easier is needed to support higher volume assembly.
Pogo pins contain tiny internal springs. When a Wombat board is pushed down onto the bed of pins, they compress a few millimeters in length. This helps to create a reliable electrical contact for each pin, even if the uncompressed lengths of the pogo pins are slightly different or they’re not perfectly aligned.
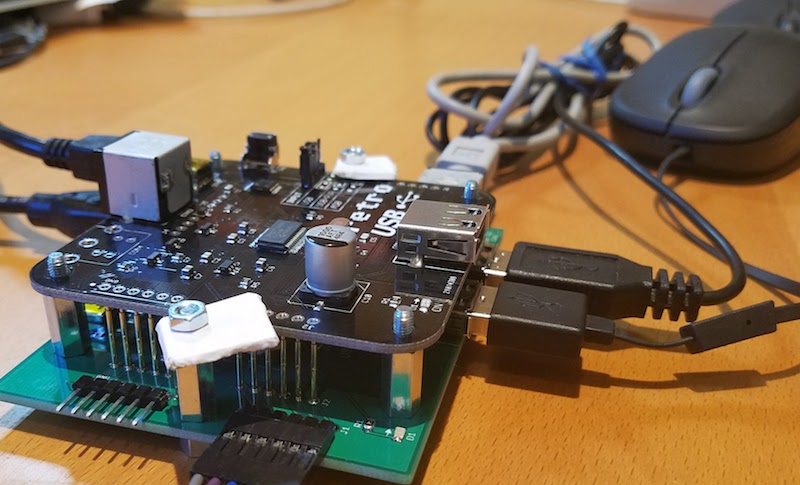
The tester has on-board ICs to open and close external loopbacks for the Wombat, so the I/O functions can be verified. It also has a power management IC that can supply the Wombat through two different interfaces, ensuring they both work. But the real value of the tester is that the power cable, PIC programmer, serial cable, ADB peripherals, and USB peripherals can all be permanently connected to the test board instead of plugged/unplugged from the Wombat for each test iteration.
Perfecting the tester took much longer than I’d expected, and it wasn’t until the third generation that it worked reliably enough to be useful. Given the size of that time investment, it’s unclear if I really achieved a net time savings, but I definitely learned a lot. Getting the mechanical aspects working smoothly was a challenge. Thinking about all the ways a Wombat could be broken was also a challenge, since I’m typically thinking about how things work instead of how they don’t work. With those possible failure modes in mind, I then needed to design circuitry to detect each failures.
If the test passes, the Wombat’s LEDs blink with a pulsing glow as shown in the video. If the test fails, the LEDs flash a variable number of times to indicate a two digit failure code. This code can be looked up on a reference sheet to see which sub-test failed, and which components are probably at fault.
Read 1 comment and join the conversation1 Comment so far
Leave a reply. For customer support issues, please use the Customer Support link instead of writing comments.
Steve,
Pogo: https://www.youtube.com/watch?v=0444n4XBiBk