

Troubleshooting Damaged Chips
There’s a big difference between building one of something, and building a hundred. When building one, the challenge is simply to get the thing working at all. When building a hundred, the focus changes to issues like how fast you can do the build, and how reliably. Little problems that only crop up rarely start to become headaches. And if you’re like me, you start to get obsessed with achieving 100% reliability without sacrificing build speed or cost.
With Floppy Emu now past the 100 units mark, I can start to get some meaningful data from the assembly process. Thus far slightly more than 90% of the units I’ve built passed all my tests, and were able to be sold. Even for a hand-built piece of hardware, that’s not great. Getting closer to 100% yield will require troubleshooting what went wrong, and making sure it doesn’t happen again, but that’s easier said than done.
Releasing the Magic Smoke
The most common failure I’ve seen is something I call “burnout”, and has affected about 4% of the units. After anywhere from one minute to a few hours of working normally, the Floppy Emu stops functioning, and both the 3.3V regulator and the CPLD become hot to the touch. The AVR, SD card, and LCD still seem to operate normally, but floppy emulation or anything else involving the CPLD no longer work. After some experimentation, I discovered that if the CPLD is removed and replaced using a hot air gun, the Floppy Emu can be returned to normal functioning and the problem does not reappear.
Hot chips imply a short circuit somewhere. Measuring the current draw is tricky, because Floppy Emu is normally connected directly to the Macintosh which powers it, and there’s no place to insert an ammeter inline and measure the current. I finally broke down and built a simple bench test rig, where the Floppy Emu is powered from an external power supply and no Macintosh is involved. This only provides a way to measure the current draw of the whole board, and not individual chips, but it’s better than nothing.
What I found is that a normal board idling on the main menu screen draws about 124 mA. Removing the CPLD with the hot air gun lowers this to 41 mA, implying that the CPLD and the incremental 3.3V regulator current are about 83 mA combined. That’s a bit more than the CPLD datasheet says is typical, but the actual supply current depends on how the CPLD is configured, so it’s within the realm of possibility. The CPLD current likely increases when the device is active and floppy emulation is happening, but I don’t have any way to measure that with the existing bench test rig.
Next, I measured a Floppy Emu in “half burnout” condition. This one actually functioned OK, but after several minutes it would grow pretty hot and stop working. Unlike the other burnout Emus I’ve had, this one would start working again if it were left to cool off for a minute. With my test rig, I measured this board’s idle current draw at 400 mA, more than three times higher than the normal board. Removing the CPLD dropped the current down to 41 mA again, so it seemed clear the trouble was related to the CPLD and not somewhere else.
So what’s going on with this burnout? It looks like something’s causing the CPLD to draw high amounts of current from the 3.3V regulator, resulting in high power dissipation and overheating in both chips. The regulator has an internal safety switch that will protect it from damage, but the CPLD apparently gets toasted. That makes sense, but what causes the high current draw in the first place? Like a good mystery detective, I came up with a few theories, which I think cover all the possibilities:
- The chip was defective. That’s possible, but blaming faulty chips should always be a last resort. In all the electronics projects I’ve ever built, only once have I ever encountered a problem that was conclusively linked to a faulty part.
- The PCB was faulty, and two closely-spaced CPLD traces were shorted together somewhere. The fact that replacing the CPLD fixed the problem seems to rule out this theory.
- A software error in the AVR program or the CPLD config caused two chips to simultaneously drive the same signal to different values. This seems unlikely, as almost all of the signals are unidirectional, and the only bidirectional signals are controlled by a simple mechanism that would be hard to go wrong. A software error should also affect all the hardware, not just a few units, unless it’s some rare timing-based error that only appears in very specific circumstances.
- The chip was damaged during assembly, due to static electricity or high heat. Possible, but I’ve never encountered a damaged AVR, and it’s the exact same package and pin count as the CPLD, and I handle it exactly the same way during assembly. Maybe the CPLD is more sensitive to mishandling somehow? Seems doubtful.
- I accidentally shorted two CPLD pins together with a poor soldering job. I carefully checked all the pins with a 10x magnifier, and couldn’t find any shorts. Still, this seems like the most plausible explanation.
- The “5V tolerant” chip isn’t very tolerant, and continuous 5V inputs eventually lead to damage. The datasheet seems clear this shouldn’t be true. Recommended operating conditions for a high input voltage are between 2.0 and 5.5 volts.
- “Bad” voltages from the Macintosh damage the CPLD, because it’s the only chip that’s directly connected to the Mac. I can’t rule this out, but it seems unlikely. It’s definitely possible for a vintage Mac’s 5V supply to be out of adjustment, but the CPLD is a 3.3V chip and doesn’t use the 5V directly. The Macintosh signal voltages could be out of whack, but I think that would also cause problems for the Mac itself.
- The Floppy Emu circuit design pushes the CPLD beyond its maximum ratings, causing damage. Maybe there’s some significant voltage overshoot or undershoot somewhere that can cause damage, or a big transient that happens at power-on. Possible, but without a specific culprit to investigate it’s hard to say.
Of these, the most likely explanations are the poor soldering job and the chip damage caused by a design that exceeds maximum ratings. Replacing the CPLD with a new one would fix both problems, since it replaces both the soldering job and the chip itself at the same time. To separate these theories, I took the “half burnout” board, removed the CPLD with the hot air gun, then resoldered the same CPLD. It still failed the same way, and drew exactly the same amount of current, demonstrating that the problem lay with the chip itself and not the soldering.
So I’ve got a few damaged CPLDs. Maybe they came defective from the factory (theory 1), maybe I damaged them during assembly (theory 4), or maybe a rare software bug causes damage (theory 3). Maybe an evil Mac is frying them with 12V logic signals (theory 7). But I’m betting on theory 8, and it’s somehow my own fault for a design that zaps the CPLD with occasional voltage overshoots, power-up transients, or other circuit gremlins that lead to failures in a small fraction of the CPLD chips.
Unfortunately there’s not a lot I can do to test this theory with the current hardware. I can only measure the current drawn by the whole board, not a single chip, and I can’t do any measurements while the board is connected to a Mac. Even if I could, an instantaneous surge in current would be met by the CPLD’s decoupling caps more than the power supply, so it might not even show up in any measurements I did. As for checking individual signals for overshoots or weird transients, it’s just not practical. The CPLD is a surface mount chip with tiny 0.5 mm pin spacing, so there’s no way to connect an oscilloscope or other probe. For now, then, there’s probably nothing to do but keep testing, and try to look for patterns in the timing and nature of future failures that might point to a more specific cause.
Read 41 comments and join the conversation
41 Comments so far
Leave a reply. For customer support issues, please use the Customer Support link instead of writing comments.
If I were you, I would send the chips back to the CPLD manufacturer for failure analysis, See if they would do that. Maybe its a problem with the chip that a failure analysis would solve, Or it could be the design.
I haven’t had a look at the schematic, But is the chip directly interfaced to the bus? its possible you need buffer ICs on the I/O of the CPLD.
i think you are hot on the trail… the first one did that.
i think its in a half burnt out state right now… it works but not really… i would like to say a power surge while plugged into a se/30 is what caused it to go melt down. The hd in the se/30 was acting up and i was power cycling the machine to get the hd to spin up and verify and boot, instead of spin up fail and spin down.
shortly after that that is when the screen went out. and i felt the chip under the lcd and it about seared my flesh.
maybe we need a couple big caps on there to stabilize it?
Uniserver, I know you’ve got a hot air tool, so you could try replacing the CPLD. This is the part: http://www.digikey.com/product-detail/en/XC9572XL-10VQG44C/122-1448-ND/966629
Very shortly I’ll be switching to factory-built boards instead of hand-building them. If I did somehow damage a few chips during assembly, hopefully that will be the end of the mystery.
If the there’s some kind of design problem, unfortunately it’s going to be much harder to track down. Even if I had a good theory what was wrong, I’d have to make a new board revision, get it manufactured, and check at least 100 boards to collect data on failure rates before I could know if the change helped.
Yes, the CPLD is directly interfaced to the Mac. Perhaps a buffer chip is called for, but I don’t think so. Normally I would use a buffer for level conversion, or for increased current drive, neither of which are necessary here.
From re-reading the CPLD datasheet (Xilinx XC9572XL), I see a few things that might be relevant:
1. Each macrocell in this chip can be configured for “high performance” or “low power” mode. Right now I think everything’s in high performance mode, but I think low power mode would still be fast enough for this purpose. That would reduce the current usage significantly, which might help if there’s an overheating problem.
2. The maximum ratings section says “Maximum DC undershoot below GND must be limited to either 0.5V or 10 mA, whichever is easier to achieve. During transitions, the device pins may undershoot to –2.0 V or overshoot to +7.0V, provided this over- or undershoot lasts less than 10 ns and with the forcing current being limited to 200 mA. External I/O voltage may not exceed VCCINT by 4.0V.” I’m pretty sure I’m not violating any of those.
3. There are a couple of potential problems that could occur just as the chip is powering up. The 3.3V supply for the CPLD will take a short time to ramp up from zero: both due to delay of the 3.3V regulator (which works off the 5V supply) as well as all the capacitors on the board that need to charge up:
3a. The datasheet says “During power-up, the XC9500XL device I/Os may be undefined until VCCINT rises above 1 Volt. This time period is called the subthreshold region, as transistors have not yet fully turned on. If VCCIO is powered before or simultaneously with VCCINT, I/Os may drive during this voltage transition range.” So it’s possible that some CPLD I/Os may briefly drive their outputs when they’re not supposed to, leading to bus contention and high current draw. But it’s probably only something on the order of a few microseconds for VCCINT to reach 1V. Is that really enough to cause a problem? In my various experiences with bus contention, a brief glitch where two outputs are fighting is no problem at all. Even contention that lasts on the order of a second doesn’t cause permanent damage. So I’m skeptical a that a few microseconds of contention would cause damage.
3b. Even while the 3.3V supply is ramping up from zero, the inputs from the Mac to the CPLD could potentially be at 5V instantly (or as close to instant as the trace and pin capacitance of the I/Os allow). The datasheet says “The 3.3V VCCINT power supply must be at least 1.5V before 5V signals are applied to the I/Os.” So potentially I’m breaking that rule, for however long it takes the 3.3V supply to get that high. But again, that’s probably only something on the order of a few microseconds. It seems like that shouldn’t matter, but maybe I’m wrong. Or maybe it takes longer for the 3.3V supply to ramp up then I think it does.
I measured the power-up time with the scope, and it’s longer than I thought. After power-on, it takes 230 microseconds for the 3.3V supply to reach 1.0V, and 240 microseconds for it to reach 1.5V. It actually sits at zero volts for 100 microseconds after the power is first turned on, which is a little surprising. I’m still not convinced that 240 us of over-voltage or bus contention on the I/Os is long enough to cause a problem, but it’s a decent theory.
The AVR also sends 5V inputs to the CPLD. I doubt 240 us is long enough for it to power on and enable its outputs, but if it were, then it could also be a problem along with the 5V inputs from the Macintosh.
Another thought is could there be a similar issue that occurs when the device is powered OFF?
Looking at the AVR datasheet and my AVR fuse settings, the AVR will remain in a reset state for at least 65 milliseconds at power-up, with all pins in a high-Z state. That’s much longer than it takes the CPLD’s 3.3V supply to ramp up, so I don’t think there could be any way for contention or over-voltage from the AVR to damage the CPLD.
So that leaves only the Macintosh-to-CPLD inputs. While I still don’t think 240 microseconds of potential over-voltage or contention could be enough to cause any damage, I’m thinking it may be wise to insert inline resistors into the nine data signals coming from the Mac to the CPLD. Even if there’s no problem here, the resistors shouldn’t hurt anything. But in the case of contention or an over-voltage, they should limit the current to a safe value. The question is what value resistors to use. Too low won’t provide enough protection, but too high will increase the signal rise/fall times due to increased RC time constant. I’m thinking something in the range of 1K to 5K ohms…
Of course, there’s no space available on the board to fit any resistors, and I can’t increase the board size without going into the next size category, but that’s another issue.
well how hard would it be to run some resistors maxx style? 🙂
yeah i can buy a couple of those. and try them out.
i don’t think its anything you are are doing.
i think you might be on track with those resistors!
i will let you know buddy.
You could reprogram a cpld with an idle program and see if it still melts down, and then attach it to the mac and see if that causes it.
I think I’m on to something with the idea of inline resistors for the Mac-to-CPLD signals. If you look at this schematic of a real Apple external 400K floppy drive, you’ll see there’s an inline 1K Ohm resistor on all those lines: http://bitsavers.trailing-edge.com/pdf/apple/disk/sony/400K_Schematic.tif Of course they weren’t doing 5V to 3.3V level conversion, so the purpose of those resistors might be different, but it’s still interesting.
Some more current measurements:
Baseline for the “half-burnout” board: 395 mA at the main menu screen
With CPLD slew rate set to slow: 375 mA (this should help reduce overall system noise too)
With CPLD slew rate set to slow and macrocells set to low-power mode: 355 mA, but floppy emulation did not work reliably
With CPLD programmed with a do-nothing idle program, all I/O pins set to keeper state: 320 mA
I also enabled brown-out reset for the AVR, with a threshold of 4.3V. It was previously disabled. This should help eliminate any potential funny business that might be happening when the device is powered off, and the supply voltage slowly drops back to zero.
If board space is an issue, use 0603 smd resistors.
I think there are two major possibilities stemming from the same phenomenon: latchup.
Basically, all CMOS ICs contain a mix of NMOS and PMOS transistors next to each other. Their different structure means that a parasitic thyristor forms between every NMOS and PMOS (i.e. every gate, IO buffer, probably everything except the ESD protection diodes). If too much current is drawn by one of the mosfets, or if the voltage applied to them overshoots the rails by a certain amount, the thyristor will turn on and short out the power supply. This is known as latchup because, once the thyristor has turned on, it WILL NOT turn off until the power is removed or the structure is destroyed! While there are ways to make a chip less susceptible to latchup, it is not possible to eliminate completely.
There are two ways I can see that your CPLD could be entering latchup:
1. If the Mac is applying 5V to the CPLD pins before the 5V supply on the board has come up, then the outputs of the IO buffers are being driven beyond the rails. This might be fixed by adding the resistors between the Mac and CPLD.
2. If the 5V IO supply on the CPLD is being applied before the 3.3V core supply (which it sounds like it is), then the level shifter between the 3.3V core logic and the 5V IO buffers will suffer a latchup that shorts the 3.3V and 5V supplies. Obviously, inline resistors on the CPLD pins will do nothing to fix this and you’ll need to revise your design to ensure the 3.3V supply comes up before the 5V supply.
Unfortunately I think the 2nd possibility is more likely. Still, adding those resistors may provide a fix, and would probably be a good idea anyway.
Thanks for the analysis. Regarding your suggestion #2, the CPLD’s core and IO supplies are both 3.3V. It’s the same supply, so they will be applied simultaneously. That’s the recommended datasheet design, so I assume it’s OK. The chip doesn’t do true 5V I/O, but it is 5V tolerant for its inputs, and its 3.3V outputs are high enough for the Mac’s TTL level inputs.
Thank you. I am starting my escapades building PCBs. Looking back, what would you have done differently during design (schematic and PCB layout)?
Nice writeup for a nasty problem, Steve.
For the potential inline 1k resistors, you may be able to use a small network like http://www.digikey.com/product-detail/en/EXB-2HV102JV/Y1102CT-ND/285381
8 resistors crammed into a 1506 size package (of course you’ll need to check power dissipation during the potential over-voltage event, etc)
bearmos – Power should be 25 milliwatts at most per resistor (5V across 1K Ohm). A package like the one you linked could work, or maybe a SIP resistor package.
Margaret – This post wasn’t so much about PCB design, but I have several older posts on that topic if you’re interested:
http://www.bigmessowires.com/2010/05/03/eagle-vs-kicad/
http://www.bigmessowires.com/2010/05/09/circuit-board-test/
http://www.bigmessowires.com/2011/06/06/off-to-the-board-house/
http://www.bigmessowires.com/2011/06/24/tiny-cpu-boards/
http://www.bigmessowires.com/2011/06/19/backcountry-logger-v1-pcb/
http://www.bigmessowires.com/2011/06/11/shrinking-the-backcountry-logger/
Steve: thanks so much. I will devour these posts. Thank you for taking the time to write them.
I had a simmaler problem with a wireless module that was supposedly 5v tolerant. The issue was when power is applied to the data lines before the 3.3v rail was powering the chip, it would in some cases feed back to the chips power rail. And after a few resets it would build up enfoe power in the bypass caps for the chip killing it when it got to 4.5-5v.
What i tried first to fix it is add a 10k resistor in line with the data and that was enfoe to prevent charge. You could also add a pull down to form a resistor divider in my case i didn’t need it.
My second solution worked best a discharge resistor across the the +3v and gnd a 800ohm to 1k
seamed to do the trick.
I got it… put a 3.6v zener across cpld vcc and gnd. That will stop backfeed overvoltage.
I recommend 100 ohm series resistors in all the signals to the Mac connector, and BAT54 clamp diodes to the CPLD 3.3 volt supply from the CPLD side of those resistors.
Here’s how that works: 100 ohms is low enough so that it doesn’t seriously degrade the logic levels. If the Mac signal is at 5V but the CPLD is not powered up yet, the diodes will clamp the CPLD side of those resistors to whatever the 3.3V supply is plus 0.4V diode drop. This should be safe for the CPLD. The 100 ohm resistors act to drop the voltage more effectively than relying on the impedance of the Mac signals. Using the diodes keeps the CPLD from sinking that current.
It’s easy to prototype, too – make an extension cable to go between the Mac and your board. Use resistors between the two connectors and tie the diodes to resistors and to the 3.3V suply on the CPLD side.
Just a thought here but with my deepest suspicions of SCR latchup caused by supply rail violations why dont you build a test fixture to cycle the crap out of one or two. You could have breakout of many signals and the option to push it to accelerated death. By this method you’d learn bucketloads. With a new board revision you could protect the CPLD from it’s host better once you’ve got your evidence. PS. Don’t forget to cut into the supply rail to monitor the current. SCR latchup would be associated with a step-change in current draw which if matched to a stripped down board with a test configuration in the CPLD would perhaps show.
agree with the others in latchup, perhaps the 5v from the io is connected before the rails of the 3.3 have time to come up and different boards have different ramp profiles.
either add resistors or fancy transistors that turn on only when the 3.3 is good.
I’d second Duncan Gunn’s suggestion — SCR latchup. I don’t see anything in there that looks like a termination resistor. A high impedance receiver (remember, you’re probably talking TTL-compatible CMOS on your end where the sending end might have been designed for true TTL that has DC loading) will see voltage doubling until the reflection makes it back to the sending end. Is there a cable involved or is this a direct connection? Longer cable = longer forward conduction of ESD diodes due to reflection overshoot- though “5V tolerant” leads me to believe the CPLD probably uses ~6V zener clamps to ground as opposed to diodes to +VCCIO. The zener method may not cause SCR latchup, but rail shunt diodes potentially can. A 6ft cable, for instance, assuming ~~2/3c propagation velocity would be about 9ns travel from source to destination when the terminal reflection occurs. This doubling drives back to the source, another 9ns away. The ESD clamps are shunting some of this of course, so it wouldn’t appear so awful on the cable. The low impedance source would absorb most of the reflection, but settling to the expected voltage might take a while. Assuming the cable is about 100 ohms, driver that isn’t source-terminated could source up to 50mA for 9ns into the diodes. Don’t rely on datasheet DC sourcing specs, they don’t tell the AC switching transient current story, generally an order of magnitude higher, but only at transitions. This is particularly true of TTL where logic high source current is typically “-1 mA” but if you did the math on the current vs load capacitance that 1mA would have a rise time measured in “months”, but the reality on the wire is much faster therefore the current is obviously much higher than “1 mA”. Just how much higher has a bearing on how likely SCR latchup is. I haven’t looked into the specifics of your circuit so this is just a suggestion to investigate.
Any chance you’ve left unused pins floating? This has occasionally caused very similar problems for me in the past.
I’m just looking the schematic and the UCF file for the CPLD. Possibly changing the unused pins from KEEPER to PULLDOWN might help deal with the floating pins? Alternatively, with a board respin you might want to explicitly ground them instead of leaving them floating.
High resolution thermal imagery might pinpoint hot traces, if it’s an external short… With enough resolution, hot pins can also point to the problem. If the ‘zoom’ is good enough (and the black plastic housing sanded on a sample), you might also be able to fat-point the failure on the chip.
Like several others my immediate suspicion is parasitic SCR latchup. It only takes a very short transient over-voltage to cause it. If the CPLD is connected to the signals that the mac is expecting to drive a floppy I’d start there (you mentioned the failure is some time after power up, so it might not be power rail sequencing). Probably by scoping the connected signals during head load/unload and track step; things the original designers might have been expecting to drive (relatively) low impedance TTL gates or transistors, where you now have high-impedance fets. A low impedance source driving down a cable to an essentially unterminated end is always going to cause ringing.
While it would require significant redesign, why not implement (in a Rev fashion) a supervisory circuit to bring up each IC in sequence. Some even have (I believe) “power good” inputs to wait before powering / unsetting a reset line on the next IC in line. While lots of hobby stuff doesn’t need it you’re making something that warrants stability, since it deals with data storage. Just my two cents.
+1 on SCR latchup.
+1 on failure analysis.
Driving very high current in/out of an I/O pin (2 to 5 times its Abs Max ratings) can cause latchup with a very short pulse, regardless of the pin configuration (digital input, digital output, or analog). Adding the 100 Ohm resistors in series with the I/O pins is an effective work-around until you can determine the true cause of the failures, and could become the eventual solution.
The only way to interrupt a latchup is to remove power from the chip – the chip is unable to do anything to affect latchup current. If this can be done quickly enough, the chip may suffer no damage, and will work normally. If allowed to bake, the chip and PCB can be destroyed.
Failure analysis (FA) can tell what was actually damaged and how, but not why. With that clue, you now have an idea what part of the circuit is causing problems. The first step in FA is a visual examination of the package for signs of damage. Next, a curve trace on all the circuit pins is performed. This will indicate if a pin is shorted low, shorted high, or open circuit (and in very rare cases, Vdd, Vss, and the pin are all fused together.) Often, curve tracing is all that is required. If curve tracing does not suggest a fault, the normal production tests are repeated to verify functionality. If the chips pass all these tests (and you buy lots of parts, or they find something… interesting), then they may start disassembling the chip.
And lastly, don’t expect all chips to be able to survive ESD events equally. Just because U1 and U2 were handled the same way doesn’t mean that both chips were undamaged.
Good luck. I’d like to hear what the eventual resolution is.
Ok, that’s a lot of votes for latchup. Which I think is the correct term for the problem I mentioned originally- 5v inputs from the Mac are applied before the CPLD’s supply voltage is fully up. According to the datasheet, 5v inputs should not be applied before the supply voltage reaches 1.5v. Remember it is a 3.3v chip with 5v tolerant inputs, so presumably it already has some kind of I/o structure to deal with over-voltage up to a point.
I’ll do a new board rev to add those resistors, unless someone has a better idea. Am I correct I want the highest resistance value that doesn’t interfere with normal operation of the device?
Latchup is a problem where an external pin (any pin) forces a large current into the die substrate because the existing traces can not handle the excess current. If this abnormal current occurs near a supply trace, a conduction channel forms between the supply traces and the die substrate (usually at ground) – the “parasitic SCR” turns on, shorting the supply to ground.
The issues with 3.3V inputs being 5V tolerant is a separate, long term reliability issue.
More likely, a current impulse appears as a result of a transient, and is capable of driving much more than 50 mA for a couple microseconds. The pulse might exceed 5V (or go below ground), but doesn’t have to go any further than a couple diode drops away from ground. Fast rising/falling edges are usually a factor.
With latchup, it’s the injected current that TRIGGERs the problem, not the voltage (though it usually takes that kind of voltage to force the current). Such pulses do not have to appear on input pins. You might be confusing these with ESD discharges.
Are you switching inductive loads? High current ground loops? ESD clamp devices are overwhelmed by this type of current impulse.
You might want to consider adding a (non-MOS) TTL part (gate, tri-state buffer or similar running off the 5v rail) acting as a buffer for the 5v inputs such that they can be forced low/off until the board is powered up.
This tackles two problems: the initial power up sequencing (which is probably not the problem you are experiencing as you mention the fault occurring “from one minute to a few hours of working normally” [1] – but still a potential problem), and conditions caused by problematic signals on the cable (ringing, coupling, noise from another floppy drive – potentially a real one with motor, stepper and solenoid, …).
Brett_cgb is right in saying that the problem can also occur on output pins. If the part is driving outputs down the cable to the Mac, then you need to remember your driving what amounts to an reactive load. What you don’t want to be doing is changing an output state then tri-stating it before it has stopped ringing.
BTW if you want to put a scope on a SMT pin, consider using a wiring pen to attach a fine wire.
[1] If the initial power up was the cause of the problem, then the device would fail on power up. Also the rise time on the 5v supply from the Mac is likely in the 10s of milliseconds, much longer than your 3v3 reg.
Thanks again for everyone’s advice and suggestions. For those who aren’t aware, you can download the schematics here: http://www.bigmessowires.com/floppy-emu-source-1.0L-F11.zip
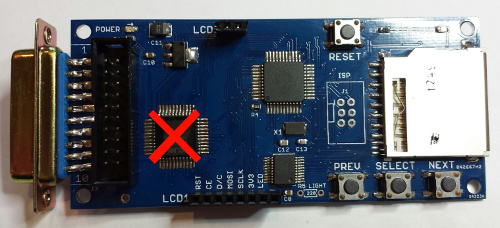
The board has an AVR microcontroller @ 5V, CPLD @ 3.3V (but 5V tolerant I/O), an SD card @ 3.3V, LCD screen @ 3.3V, and a buffer chip used for 5V to 3.3V level conversion for the SD card and LCD. There are no inductive loads or anything else that you’d expect to cause large current surges. The Macintosh floppy port is connected directly to CPLD I/O pins. There are 9 inputs from the Mac to the CPLD, and one output. All signals are unidirectional and there is no tri-stated logic in this section. There are no floating CPLD pins – all unused pins are set to KEEPER which maintains them at a valid logic level.
I suspect damage may occur by “hot plugging” the Floppy Emu board when the Mac is already on. In this case, the I/Os will nearly instantly reach 5V but the CPLD’s 3.3V supply will take about 240 microseconds to reach the minimum safe value of 1.5V specified by the data sheet. Is that 1.5V value meant to avoid latchup, or to avoid damaging the circuitry that makes the I/Os 5V tolerant, I don’t know. Maybe it doesn’t matter if the solution is the same.
Given the description of latchup, I agree it sounds like a problem that would either appear at the instant the board is plugged in, or would not happen at all. But if it’s the 5V tolerance circuitry that’s being damaged, maybe the damage is cumulative somehow. Perhaps there’s a current surge that happens when hot-plugging that damages the chip internally, creating a small leakage between a signal and a supply or between power and ground. These would cause the chip to run hot, but it might still work for a while until another surge worsened the damage, or the heat itself toasted the chip. That’s all speculation, but it sounds reasonable to me.
In one case where I saw this burnout problem, the board failed immediately after plugging it in. In two other cases, the board failed mid-way through a long disk copy operation. Two similar failures were reported by people “in the field”, so I don’t know if they happened at the moment of plug-in or mid-way through a disk operation.
I test the boards on three different Macs. Two of them I test while using a 3 foot extension cable from the Mac to the board, but on the 3rd Mac I test by plugging the board directly into the floppy port, with no cable. The times the burnout problem has appeared, it’s always been on this third Mac. My hunch is that the 3 foot extension cable acts as a small resistor and inductor that prevents the 5V signals from the Mac from rising quite as fast during hot-plugging as they do when plugged directly into the Mac’s floppy port.
Perhaps a better question than “what’s the cause of the problem” is “what changes should I make to hopefully avoid this problem?” I don’t have the tools to do a failure analysis or thermal imaging. To my understanding, the problems of latchup, 5V tolerance circuitry damage, 3.3V supply being pushed above 3.3V, reflections/overshoot due to lack of termination, and ESD damage would all be reduced or eliminated with inline resistors on the Mac to CPLD inputs. A 5V buffer chip like an 74LS244 might also work, but would require bigger changes and some mechanism to enable/disable it at the appropriate times. A zener or resistor between 3.3V and GND would help if the 3.3V supply is being pushed too high, but I don’t think it would help the other problems.
Resistors combined with diodes might be even better than resistors alone, but would be more cumbersome and (I think) unnecessary. With a 1K resistor, even if the CPLD input were acting as a direct short to ground, the current would still be limited to 5 mA at most which I assume (???) should be safe.
Prototyping a new setup is possible, and it could show that I didn’t make anything WORSE, but I can’t know if I’ve made anything better until 100 or so boards with the new design are built and tested. At the rate I’m going, that’s several months, so the best I can really do is make an educated guess and go with it.
TL;DNR – I think I’m going to put in some 1K Ohm resistors and cross my fingers. 🙂
I am not an expert – just speaking from my understanding of matters
Every CMOS I/O pin features diodes connected GND -|>|- IO pin -|>|- VDD. These exist to shunt small voltage spikes outside of the rails (e.g. from conductor LC effects) to the power supply rails, which probably have big capacitors to easily soak them up, and are generally quite resilient. They exist to protect the device’s input and output buffers from such voltages.
Because the CPLD is “5V tolerant”, what this means is that the diode to VDD has probably been replaced with one/a series of diodes intended to create a higher voltage drop (we can guess that this is ~5.5V-1.5V = 4V)
Now, what happens if a 5V signal is present before the rail voltage has risen? Well, obviously the diode turns on and conducts that voltage to the power rail. The boards’ bulk storage capacitors are now being charged through the CPLDs I/O pins (current is flowing out of the VDD pins!). Needless to say, the diodes are small and pretty weedy and very much not designed for this. They’ll get very hot, and then quite possibly blow. In the process, they’ll likely take out the input buffer. If they don’t, ensuing spikes and static discharge definitely will now that the spike suppression diode has gone.
(*In addition, the I/O transistors will be built larger to take the voltage)
Failures only when plugging in using a cable is a significant clue. That suggests signal risetimes are a factor, suggesting latchup. ESD may still be a factor – make sure both items are ESD grounded before connecting. It also suggests that the issues are contained within the plugin circuits.
Another question: Did the computer glitch when the failure occurred? What happened?
> Perhaps a better question than “what’s the cause of the problem” is
> “what changes should I make to hopefully avoid this problem?”
> I don’t have the tools to do a failure analysis or thermal imaging.
No, the better question is still “what’s the cause of the problem”. Be sure you’re fixing the correct problem. Once you know the cause, appropriate solutions become obvious. Until then, you’re guessing.
You should have already done the examinations below before considering FA or respinning the board.
Do a strong visual inspection, and take your time – do not rush through this. Use a lighted magnifying lens or low power microscope. Clean up excess flux (the presence of flux has never fixed a problem, but it does contribute to problems, and can hide them very well.) Look for burns on leads and traces, bad solder joints, overheated traces, cracked/pitted packages, solder splash across traces/leads, and anything else that just doesn’t look right. Fix what you can. This is generally my first step in troubling a failed board… and I find most failures and many more problems this way.
You can probe pins with a multi-meter (low voltage resistance, and diode test) looking for shorts and opens; check each pin against ground and all supply rails, possibly between adjacent pins, and both polarities. Compare to a known good board. Check several failed boards. It’s not enough to know that a part failed – you need to understand how it failed. Why may become obvious with understanding.
Don’t worry about the 5V tolerance issues. The part was built with that in mind. Just verify that ALL the pins being driven to 5V are actually tolerant (check the datasheet against your schematics), and that you’ve met the power supply decoupling requirements (especially the 0.1uF ceramics next to the parts; check schematics against PCB layout).
Gather data, look for patterns.
Thermal imaging is nice, but almost no one has that capability. An alternative is an IR thermometer, and can be found at the hardware store for $70. But you already know what’s getting very hot. This would be a “nice to have” tool, but not necessary.
If you still have no clues what happened (they can’t help you with why), contact a manufacturer representative for FA and send 2-3 failed parts (you did save some, didn’t you?). It may be a week or so before you get FA results, but they are very strong clues. Re-spining the board can wait that long.
Dumb question: If you just want to test adding series resistors, why not obtain a male and female 15 pin connectors and make a simple (and short) adapter?
Because it’s a rare problem that only appears maybe 4% of the time, and even then sometimes not right away. Building a one-off with series resistors wouldn’t really prove anything. I need to build a large number of units with the new design in order to see if the failure rate changes.
I was more referring to something that you could plug into the back of the third mac and leave there, essentially simulating a cable. That said, with a 4% failure rate, you’d need a _huge_ number of boards to pass with that setup before you could call it a viable solution.
I think I mistakenly thought it was a much simpler problem – not cumulative damage as the current theory states.
To make the board more robust, you should add 74LS buffers (not ‘HCT!) to the Macintosh interface. IIRC there are no bidirectional lines, so simple 74LS245 should work. If you use gates with output enable, these could be activated by the AVR after the CPLD’s supply has settled.
Connecting the CPLD directly to the outside world is really lion-hearted. In case the IWM chip issues any high-level before your 3.3V supply has settled, it may cause a latch-up. This causes the chip to draw exessive current, and in case the voltage regulator is able to supply it, the CPLD will destroy itself. Otherwise you might be able to rescue it by quickly powering down to 0V.
If you did not see this effect during checkout testing this does not mean that it will not be there over device lifetime. The probability is the same for each power-up sequence.
Latchup is temperature sensitive. Higher temps make latchup easier to trigger. I know you don’t have too much flexibility with the supplies, and that all supplies are connected together, but if you have the ability to current limit the supply so as not to damage the IC, then you can try seeing if you can latch up *any* part you have on a given board (look for the above mentioned step up in current), and if you see it at elevated temp and you manage to not damage the IC, try cooling it down, maybe in the fridge, and see if the problem goes away. In my experience, if a product’s pin is susceptible to trigger latchup, every part will have that problem, but maybe at varying injections currents (either current into the pin above the rail, or out of the pin below ground) or at varying temperatures if the current is fixed.
Use whatever high temp you feel comfortable using with your board. Not sure what the components are rated for. Same with low temp.
Just a quick thought – if it’s the hot-plugging that’s doing it, then it’s not 4% of the boards that are bad – it’s some percentage of the time that they get plugged in that they break. In other words, they’re all bad, and just waiting for the problem to occur. Try hot plugging a not-yet-broken board over and over until you can reproduce the problem on that board.
One possible way of doing this, probably with less risk, use a row of tri-state buffers to protect the 5V I/O lines from being connected before everything else is ready. The buffers are powered by the 5V rail from the Mac, so themselves latching up would be rare, and the buffers are kept in high-Z until the AVR is ready, as it is the last part of this board to be up and running. Also those buffers can be a lot cheaper and easier to replace if broken (that is, buffer chips can be considered as consumables if you have to,) and a destroyed buffer will not stress your CPLD but will inform your AVR, so if you ended up having those buffer chips releasing magic smoke you can socket them and provide every buyer a set of spares or two.
I was just nerding around reading old stuff when I found this gem
http://exxos.www.idnet.com/IMPULSE/atari/last/gigafile/index.htm
Gigafile is a SCSI hardware emulator / SD card reader for Atari computers
http://shop.inventronik.de/store/11
5V atari non differential SCSI(ACSI) bus, 3.3V EP1C3 (not even 5v tolerant, all I see is some drop resistors on pictures of this product) and lots of problems
thought you might be interested in it